One of the labor-saving features of DFE’s tension indicator and controller products is Quik-Cal™ technology. With Quik-Cal™, indication and control electronics use front-panel push buttons or menu prompts instead of potentiometers to perform calibration, allowing the convenience of not needing a screwdriver or second person to assist in the process. Potentiometers are prone to corrosion and mechanical wear over time, so Quik-Cal™ technology also eliminates a failure point that can lead to tension drift or measurement instability.
ZERO & CALIBRATION PROCESS
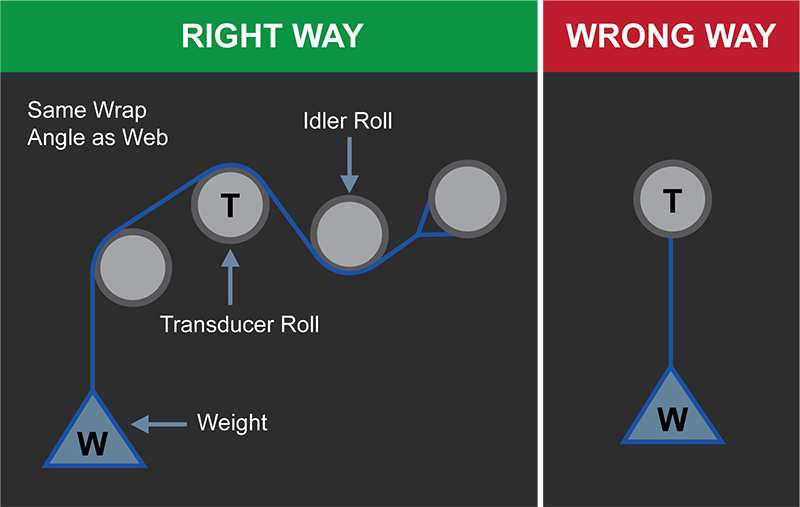
The zero and calibration process is relatively simple. An output signal is generated by the weight of an unloaded (non-webbed) transducer roll. Prior to calibration we must negate the roll weight in a procedure called ‘zeroing’. Once the indicator has been zeroed, calibration can be completed by hanging a known weight on a cord between the idler rolls in the machine web path such that the wrap angle over the transducer roll is kept identical to the one used while in operation. The indicator automatically multiplies the calibration weight by a preset calibration ratio to calculate the full-scale output of the indicator.
The calibration ratio can be set at one of two preset values, 10 or 25 percent. For example, if a 10 pound weight is hung for calibration, the indicator will store that value as 10% of its full output. As a result, 100 pounds of tension (10 x 10) during operation will result in the indicator reaching its full-scale output. If the calibration ratio of 25% is selected instead, the same 10 pound calibration weight will represent 25% of the indicator’s full scale output. So in this case, 40 pounds of tension (10 x 4) exerted on the transducer roll during operation would reach the indicator’s full output signal (also known as tension scale).
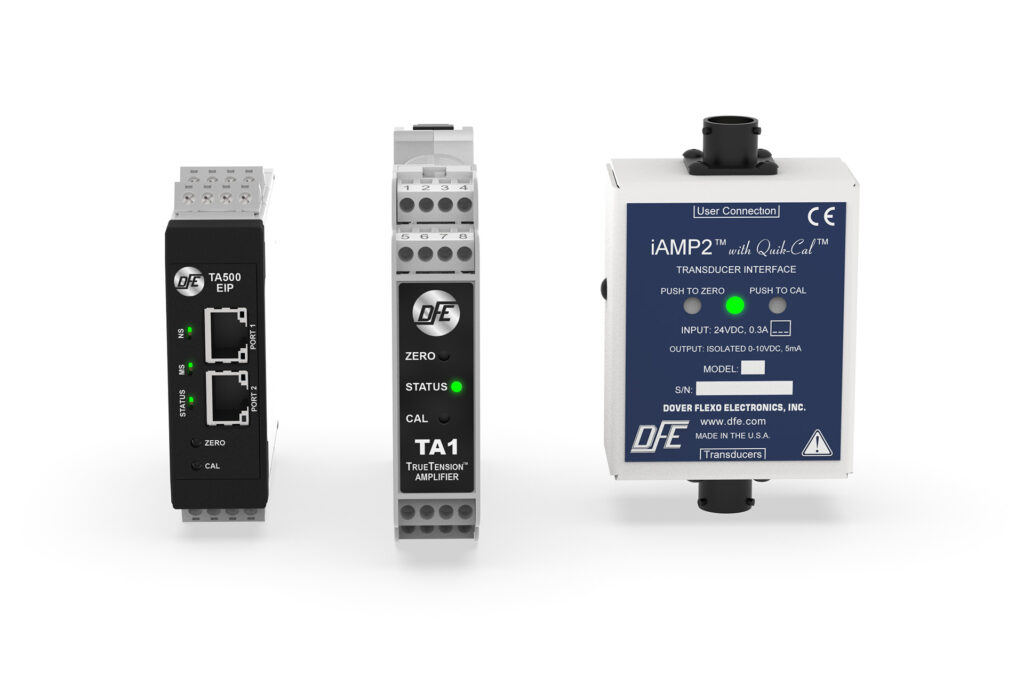
FIRST & SECOND GENERATION QUIK-CAL™ AMPLIFIERS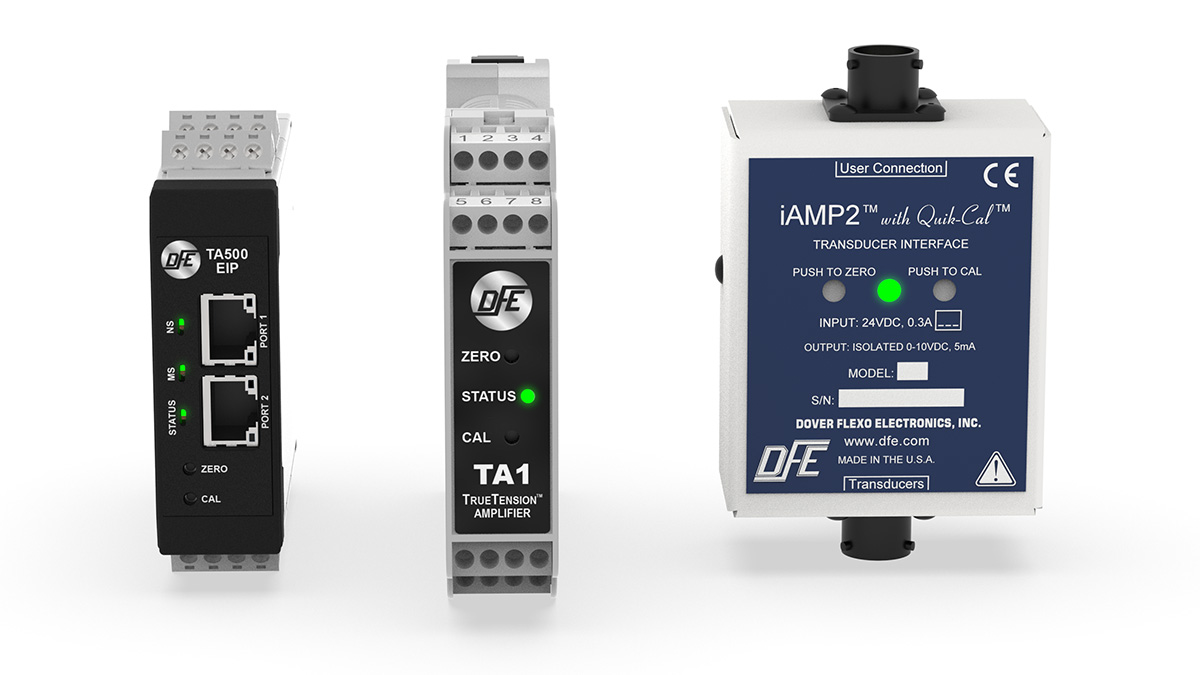 First generation tension indicators and amplifiers (TI17C, TI18C, TI22, TI23, TI24) can calibrate with a 10% or 25% weight by selecting the appropriate jumper position on the circuit card. After the appropriate calibration ratio is selected, setting zero requires depressing the ZERO button for one second. After the calibration weight has been hung, pressing the CAL button for one second calculates and stores the calibration range.
Second generation tension amplifiers (TA1, TA500) do not require jumper selection to set the calibration ratio. After performing the zero function and hanging the calibration weight, operators simply press the CAL button for 1 second to calibrate at the 10% ratio or 10 seconds to calibrate at the 25% ratio.
TOUCHSCREEN INDICATORS & CONTROLLERS
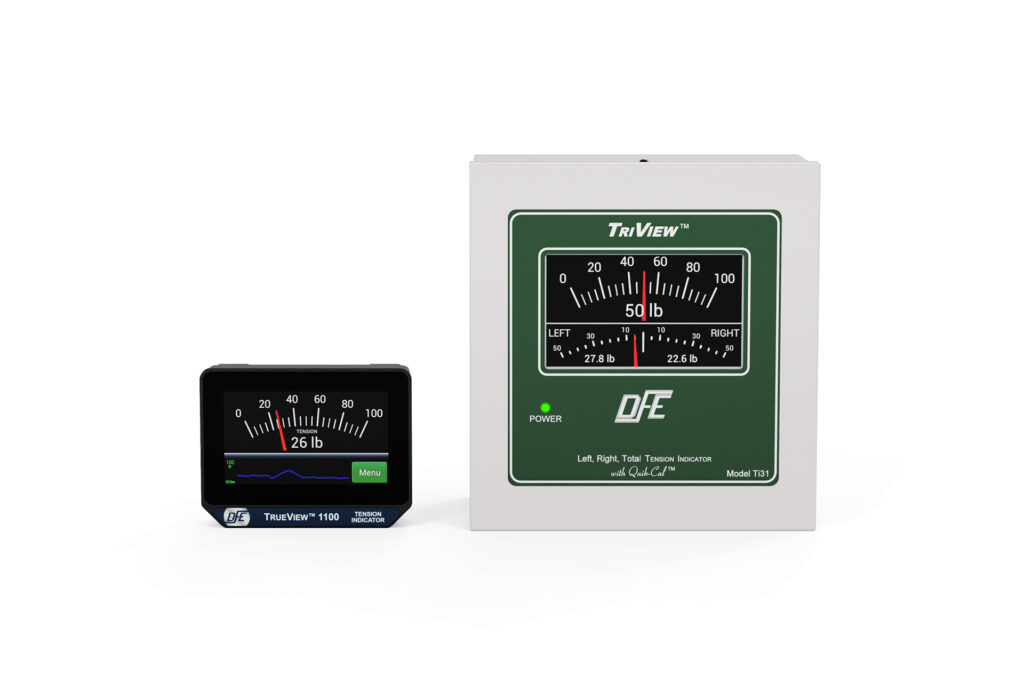
Indicators such as the TrueView™ 1100 and controllers such as the SteadyWeb™ 6 guide the operator through the Zero and Calibration process on a touchscreen interface with a series of easy-to-follow screen prompts from within the calibration menu.
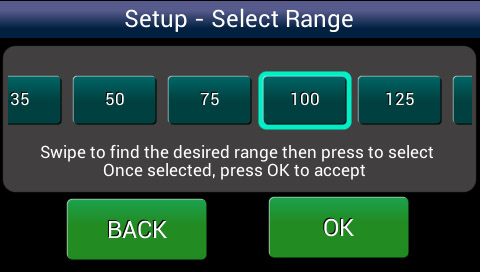
After selecting the units of measure (lb, oz, g, Kg or N), then select the measurement & display range.
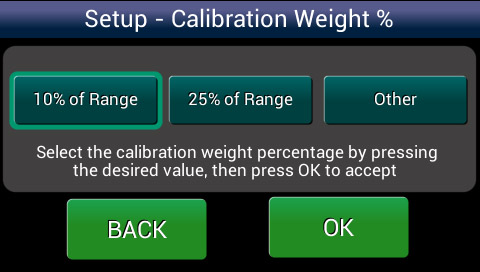
Next, select the preferred calibration weight percentage.
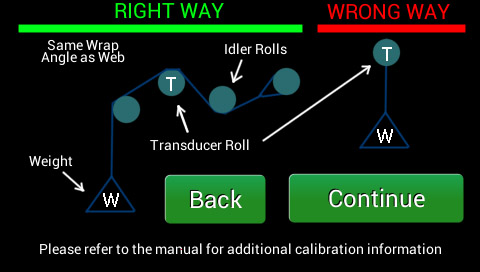
Confirm that your calibration weight in placed in the correct position relative to the tension roller.
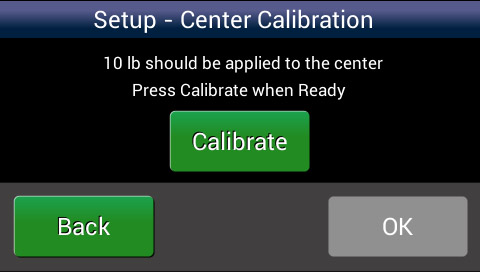
Finally, confirm that the calibration weight on the screen matches the weight you have hung on the machine and press Calibrate to store the calibration. Once complete, the operator screen will display the units of measure and calibration range that you programmed.

Like the push-button method employed with DFE amplifiers, calibration is stored digitally, providing long-term stability without the worry of tension drift.